Frequently Asked Questions
- About our accounts
- Email Account How-Tos
- How do I renew a FREE subscription?
- How do I change my email address or username?
- How do I upgrade my account?
- How do I set up/manage my aliases?
- How do I use multiple identities?
- How do I set up email filters?
- Getting started
- Glossary
- Most Common Questions
- What is the total maximum file size an email attachment can be?
- How can I archive my emails for safekeeping or transfer?
- I can't send/receive emails from my mail client/phone.
- Registration
- Tips and information
- Troubleshooting
To upgrade your Account, log in and go to the My Account dashboard. If you are logged in to your webmail inbox, you can access My Account by clicking on the button in the top right of the page.
On the My Account page, you will be able to click on Email Accounts on the left. This will show you all the email accounts you currently own. If you wish to upgrade one of these accounts, click on the green See Upgrades button:

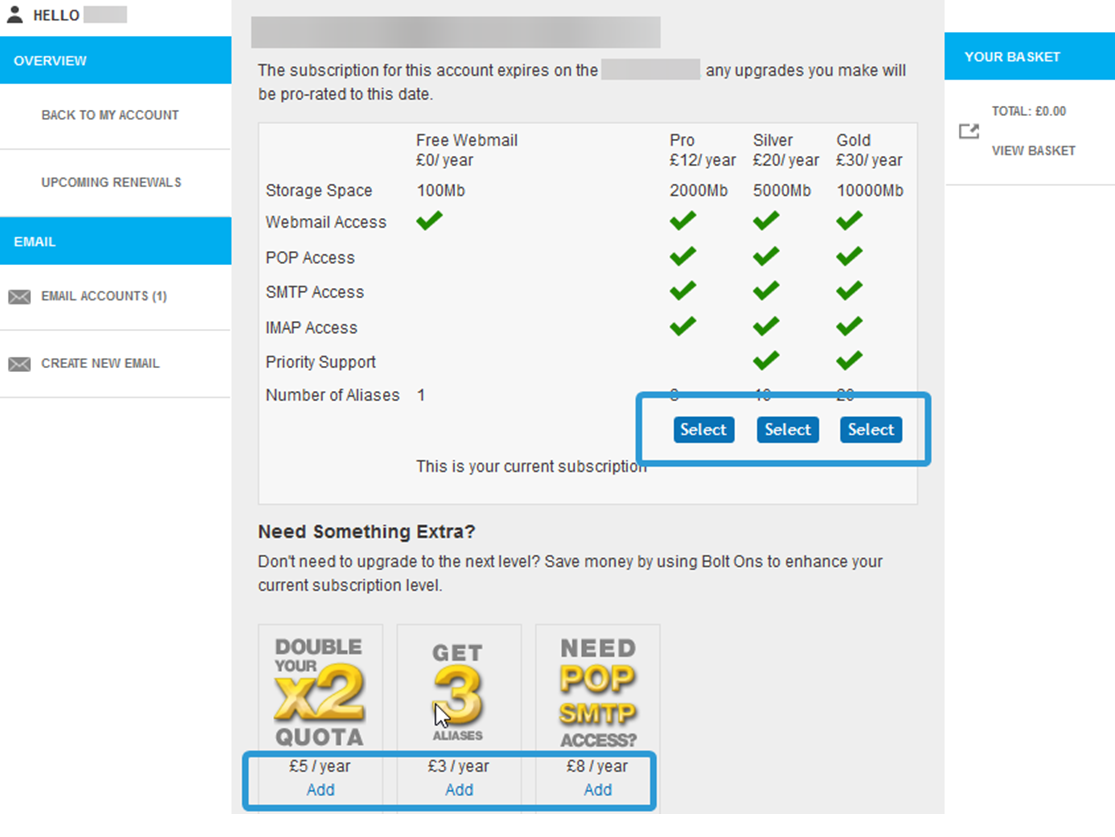
You will be presented with a range of Packages and Bolt-Ons that you can add to your Account. Click Select to add a Package. You can also choose any Bolt-Ons by clicking Add.
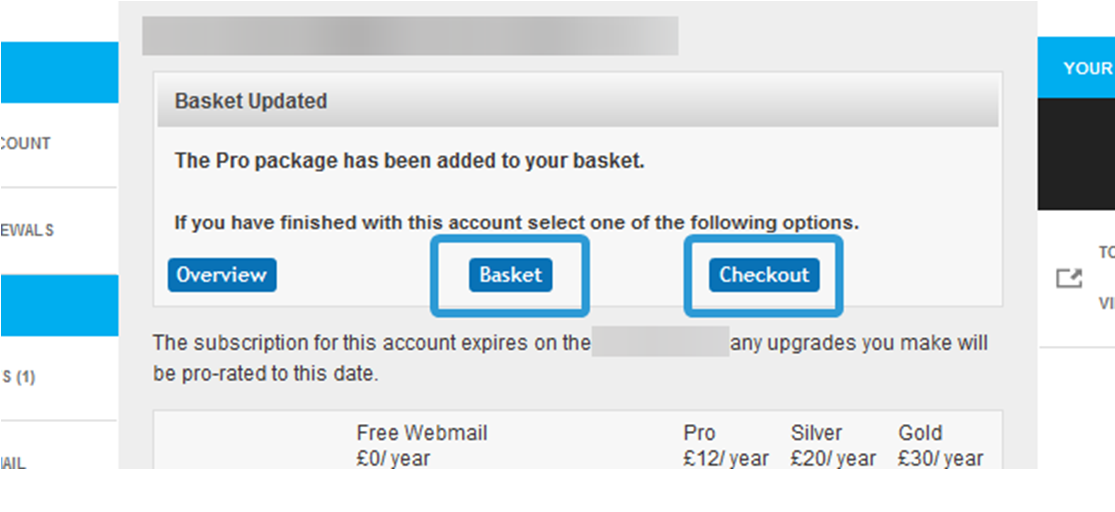
Once selected, the Packages and Bolt-Ons will be added to your Basket. You can click on Basket or Checkout to view details of the upgrades you have selected and continue with upgrading your Account.
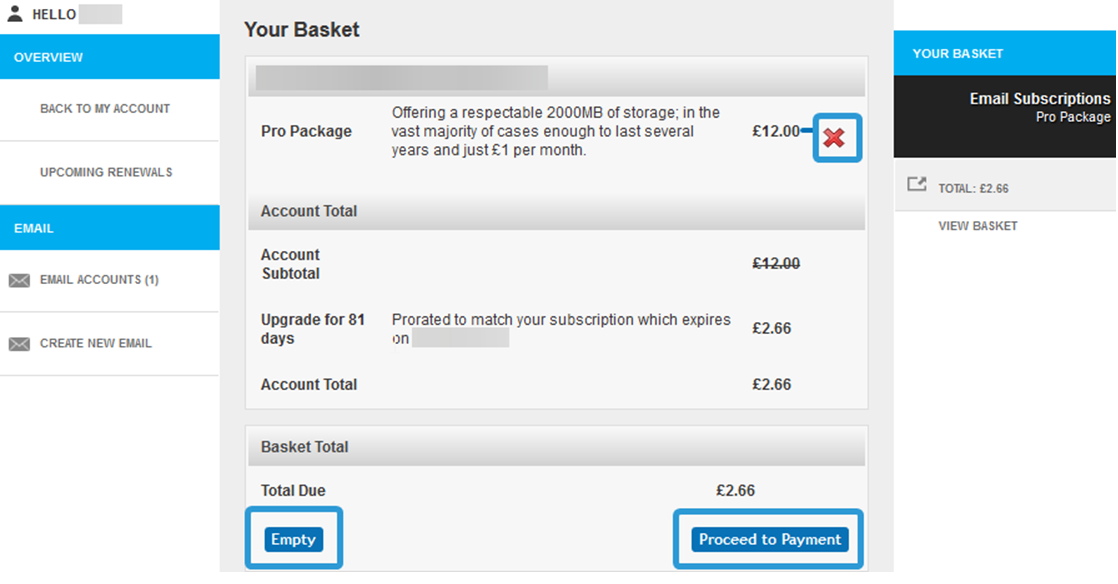
Your Basket will show all the Packages and Bolt-Ons you have selected, and show the total amount due for the upgrade. This is calculated on a pro rata basis to match your renewal date. Click on Proceed to Payment if you wish to continue with your upgrade. Alternatively, you can click Empty to clear your basket or remove any items in your basket using the small red cross next to the item.
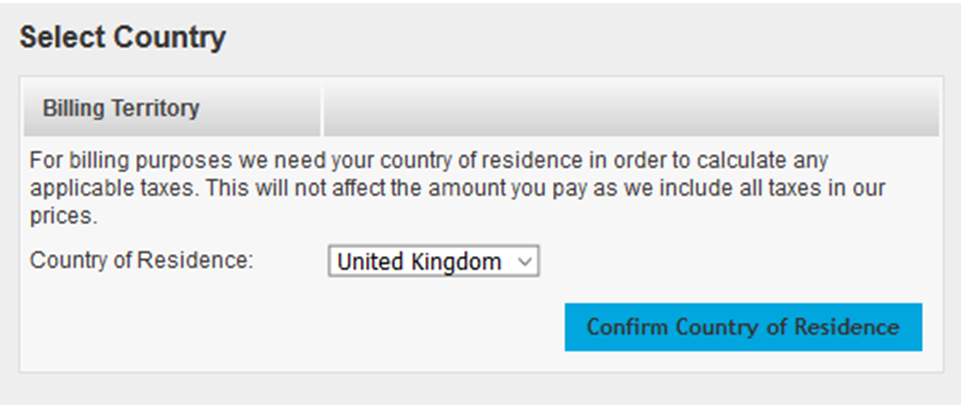
After clicking Proceed to Payment, you will be asked to pick your Country of Residence from the Dropdown. After you have done this, click Confirm Country of Residence to continue.
You will be asked to select your payment method on the next page. Choose between Card (via SagePay), Cheque (by post) or set up a Direct Debit (via GoCardless).
CARD
Paying by a Debit or Credit card allow you to pay once up to your next renewal date using SagePay.
If it is your first time choosing the card option, you will be asked to fill in your billing details and other relevant information before clicking Proceed at the bottom.
This will then take you through to enter your card details via SagePay.
Otherwise, you can click Use next to an existing card shown at the top.
DIRECT DEBIT
Selecting a Direct Debit subscription allows you to set up a recurring payment for your account, which will be taken yearly on the renewal date for your email account. The Direct Debit service for our accounts is provided by GoCardless.
After selecting Direct Debit, you will be taken to the GoCardless Direct Debit form to set up a recurring payment.
Once completed, it usually takes around four days for payments to be confirmed, though your account will be upgraded immediately.
Should there be any problems with the payment you will be notified and your subscription will be reverted.
CHEQUE
If you select cheque, the system will provide you with details of where to send the cheque, for what amount, and give you the order number to write on the back of the cheque.
Please ensure that all cheques are made out to Aluminati Network Group.
If you have any questions about upgrading your account, please contact our helpdesk at help@aluminati.net
Aliases allow you to set up an additional email address on your account. To read more about Aliases, please see our help guide here.
You can set up and manage your Aliases by logging in to your Account and going to the My Account dashboard. If you are logged in to your webmail inbox, you can access My Account by clicking on the button in the top right of the page.
On the My Account page, you will be able to click on Email Accounts on the left. This will show you all the email accounts you currently own. Each of your email accounts will have a Manage Aliases button. It will also list how many Aliases you can have on your email account.

Clicking on Manage Aliases will take you to the page in order to set up or edit your Aliases.
If you are already using all of your Aliases and would like more, you can click on Purchase. This will take you to the Payment Portal, and you can select a Package or Bolt-On if you would like more Aliases.
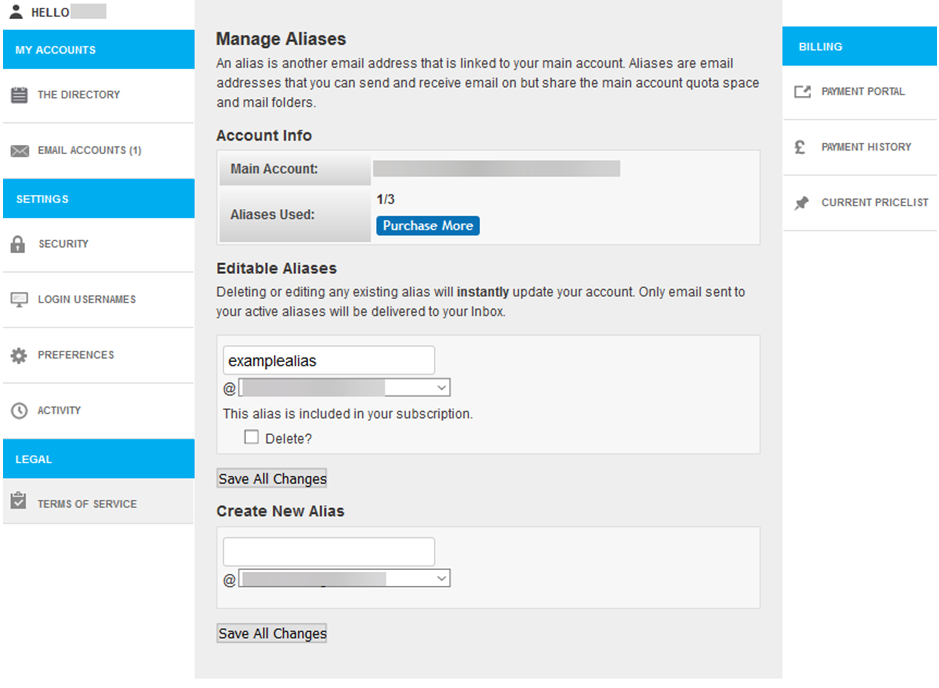
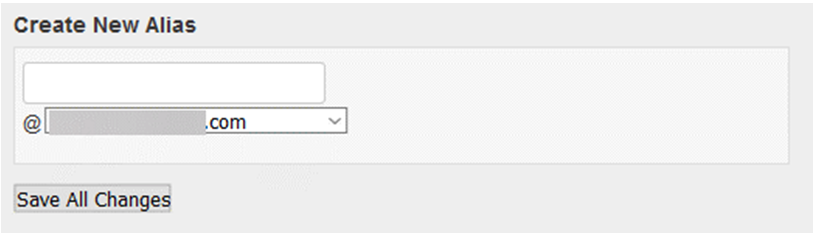
- To add an Alias: Use the Create New Alias box to set up a new Alias. You can choose what address the Alias has, and can select which domain you wish to use from the dropdown. You can then click Save All Changes to save your new Alias.
- To edit an Alias: If you have an Alias already set up, it will appear in the Editable Aliases section. If you wish to change the Alias address, simply change it in the text box. You can also choose a different domain if these are available, by selecting this from the dropdown box. You can then click Save All Changesto save the changes you have made.
You can update an Alias as much as you want, but when you update it, it will delete the old one. If an email is then sent to the old Alias, it will be bounced back to the sender. The new Alias you have set up will be active immediately, and emails can be sent to it as soon as you have saved it.
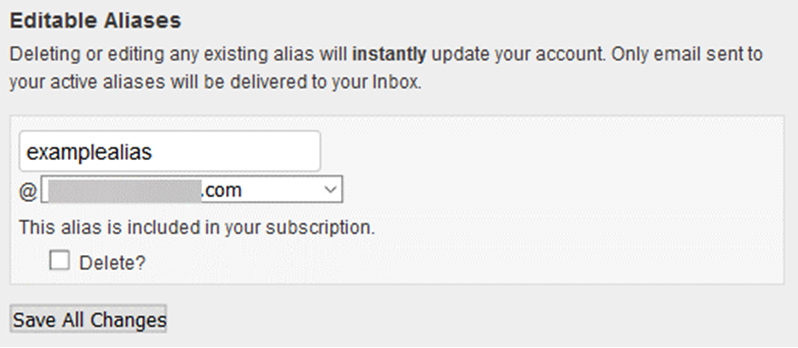
- To delete an Alias: If you wish to remove an Alias completely, you can select the Delete? Tickbox in the Editable Aliases section. Once you have ticked this box, you can click Save All Changes to remove the Alias from your email account.
If an email is then sent to the deleted Alias, it will be bounced back to the sender.
If you would like to set up your email account to send emails from your alias, you can set it up as a Multiple Identity. You can read more about Multiple Identities in our help guide here.
If you have any questions about setting up or editing your Aliases, please contact our helpdesk at help@aluminati.net
Multiple identities are a way to configure your account to send from the Email Aliases you have set up on your Account. For more details on setting up Aliases, please see our help guide here.
To set up Multiple Identities on your account, follow the steps below.
Any time you add an Alias to your Account, it will automatically be set up as a new Identity. You can check and edit your Identities by following the steps below:
- Go to Settings found in the top right hand of the screen.
- Go to the Identities section.
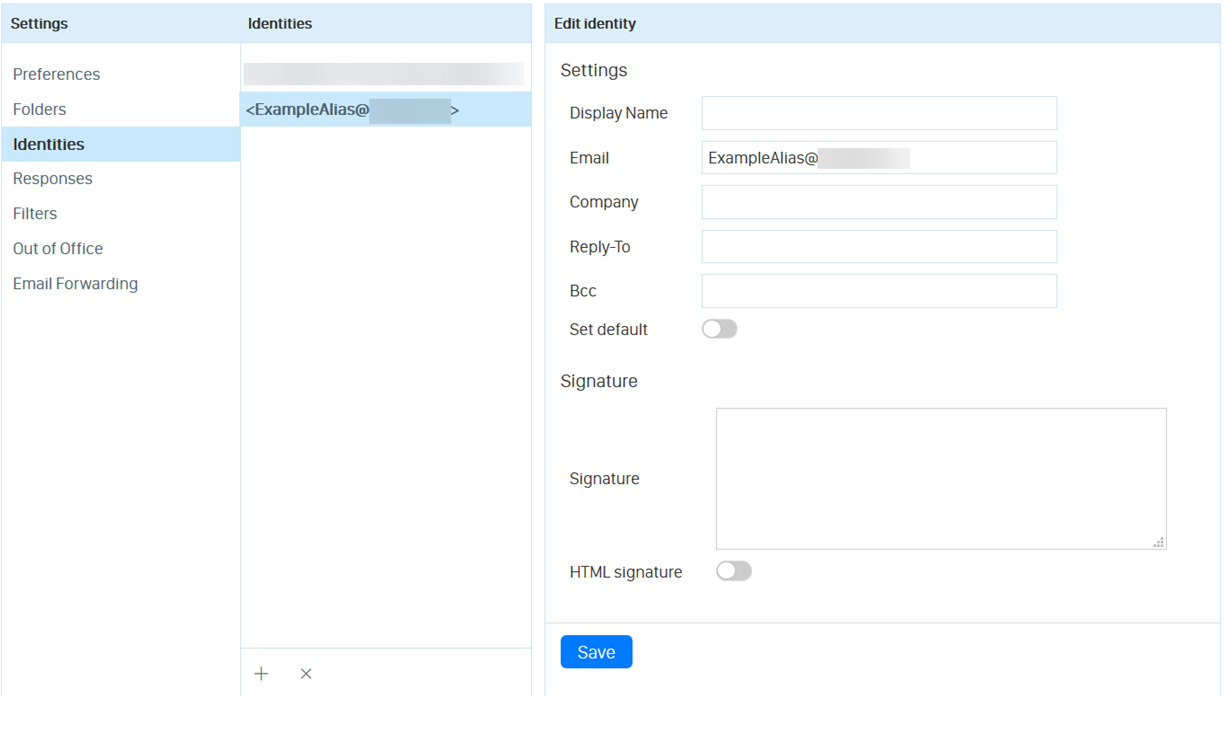
- Click on the Email Address you wish to update. This will show the settings that you can edit to set up your Identity.
If you have any issues setting up an Identity, please contact our helpdesk at help@aluminati.net
Email Filters allow you to set up automatic processes for managing your Email. This can be used for moving certain Emails to a particular folder, deleting the message, sending an automated response and a host of other options.
To set up an Email Filter, log in to your Webmail Inbox and go to Settings. You can find this in the top left of the screen.
You can then go to the Filters section:
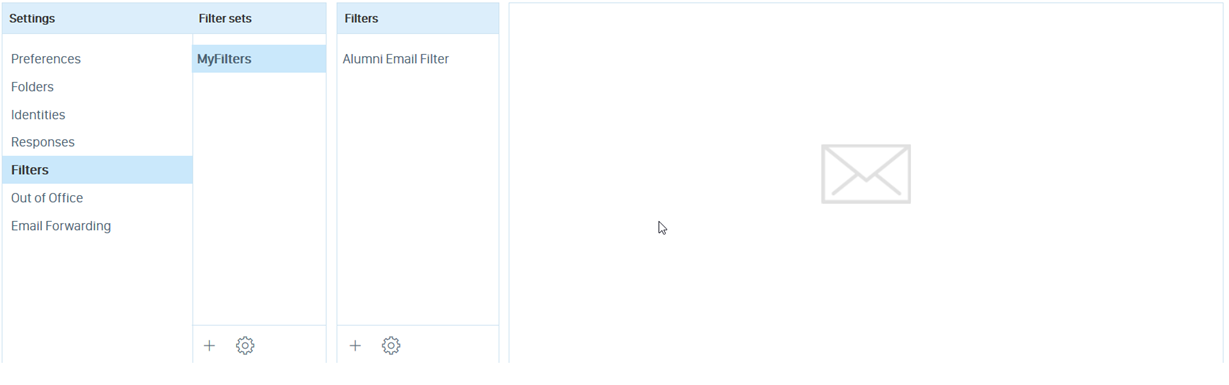
To set up a new Filter, follow the steps below:
- Click on the small plus sign (+) under the Filters heading. This will bring up all the options for setting a new Filter.
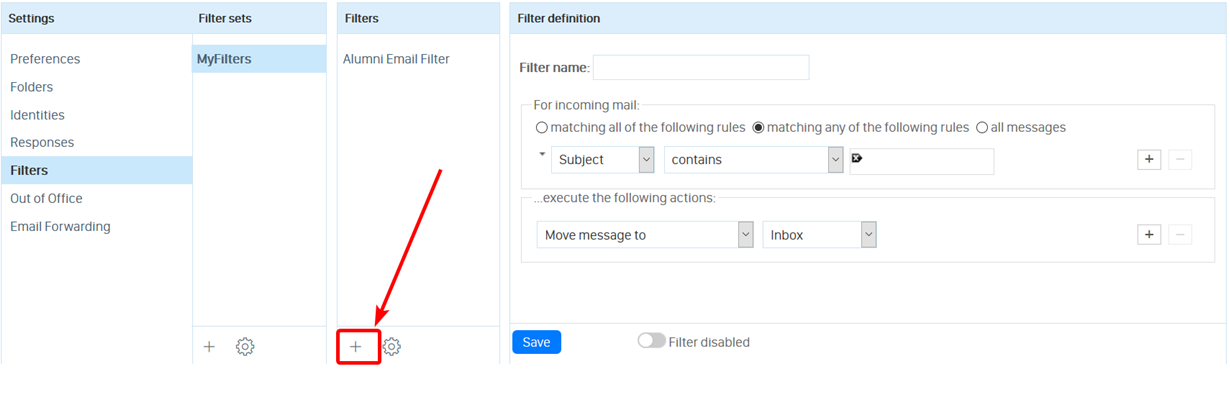
- Add a Filter name and some rules to your Filter. Rules are added under the For incoming mail section, and contain a variety of different conditions you can set. Use the dropdown boxes to select the rule you wish to set up. You can add and delete rules using the +/- buttons on the right.
- Add an action for the filter to perform if the rules are met. This is done under the execute the following actions section, and you can use the dropdown boxes to decide what actions are taken.
- You can enable or disable the filter using the Filter disabled toggle at the bottom of the screen.
- Once happy with your Filter, you can click Save.
After a filter is saved, it will appear in the list under the Filters column. To edit the Filter again, you can simply click on it in this list.
If you require any assistance setting up a Filter for your email account, please contact our support desk, who will be more than happy to help. You can contact them at help@aluminati.net
From 28 days before your account renewal date, you will start receiving reminder emails. If you choose to downgrade, your account will be automatically renewed each year for free, unless it is upgraded in the meantime.
To renew your Account with the Free Webmail Package, log in and go to the My Account dashboard. If you are logged in to your webmail inbox, you can access My Account by clicking on the button in the top right of the page.
On the My Account page, you will be able to click on Email Accounts on the left. This will show you all the email accounts you currently own. If any of your Email Accounts are due for renewal, a yellow Renew button will be shown. You can click this button to renew the subscription on your Account.

You will be presented with a range of Packages and Bolt-Ons that you can add to your Account. To renew with the Free Webmail Package, simply click Select under the Free Webmail option.

This will add the Free Webmail Package to your basket. Click either Basket or Checkout at the top of the page to continue.

The next page will display the details of the Free Webmail account you are renewing. Click on Confirm Free Account to complete the renewal. A red warning box may be shown if you are downgrading from a paid subscription.

*BEFORE DOWNGRADING* Please check your current quota usage. If you are using more than 200MB, then downgrading will push your account over quota and may prevent you from receiving new emails. You can learn more about Quota usage here.
You will also no longer be able to use an email program or app such as Outlook or a mobile phone with your email account.
If you have any questions about renewing your free webmail package, please contact our helpdesk at help@aluminati.net
If your personal details have changed (for example, after getting married), you may wish to change your email address to reflect this.
Before looking at altering your primary address though, you might consider adding or using one of your aliases as an extra email address. This can be useful if you would like to retain your old address in case you are still contacted on it.
If you would like to set up an Alias for your account, you can find a help guide that goes in to the details of this here.
Email Address Change
If you still wish to update your email address, please contact our helpdesk from your alternative email account with details of what you would like it changed to. You can contact our helpdesk at help@aluminati.net
After we start the process, it will take 24 hours before it is switched over. Once it is completed, a temporary alias of your old address will be automatically created for 30 days to give you a chance to inform your contacts about your new one.
You will receive an automatic email confirmation at the start, and the next day when it completes.
PLEASE NOTE: If you already own the email address in question as an alias but wish to use it as your primary account, then the alias will need to be changed or removed before we can begin, as the system will not allow use of an address that is already in use.
Emails sent to your alias address during these 24 hours will bounce back to the sender.
Username Change
The procedure for changing your username is the same as for your email address, except the change is immediate rather than taking place the next day. It has no effect on your email address. Please contact our helpdesk at help@aluminati.net if you would like to change your Username.